Embedded Getting Started Guide
Work in progress
Contents
Introduction
Flowcode is an Integrated Development Environment (IDE) for programming microcontrollers such as 8, 16 and 32bit PIC, Arduino, ESP32, PICO and ARM devices. It achieves this by using flowcharts instead of text based languages, thus making programming simpler and faster.
Flowcode also contains hundreds of pre-made component libraries, allowing users to interface with a host of sensors, inputs and outputs and electromechanical components with ease. Despite its simplicity and ease of use, Flowcode is a powerful tool allowing users to develop even the most complex of embedded systems.
Prerequisites
• A Windows based PC with a copy of Flowcode 10 installed
Should haves for this guide
• Supported hardware—a list covered in this guide is provided above • USB cable to both power and program the microcontroller of choice
What we’ll cover in this guide?
This guide will be split into two main sections: In section 1 we will provide an overview of the Flowcode IDE. How users interact with the environment, add components to the simulation panel and create flowcharts.
In section 2 we will run through three examples which will increase in complexity and teach you how to create microcontroller programs.
Flowcode supports both Matrix and 3rd party hardware. In this guide we will create examples based on three different sets of hardware;
- Matrix BL0011 multi-programmer and BL0114 combo board
- Arduino Uno and Matrix BL0114 combo board
- Microchip Xpress board
Section 1: The Flowcode IDE
In this section we will provide an overview of Flowcode, detailing the programming interface and how users interact with it to create microcontroller programs.
Creating a project
When you first launch Flowcode you will be presented with the following splash screen. For the first run through we want to start a new project as this gives us a blank canvas to go over the IDE. Later we will look at the use of pre�configured template files.
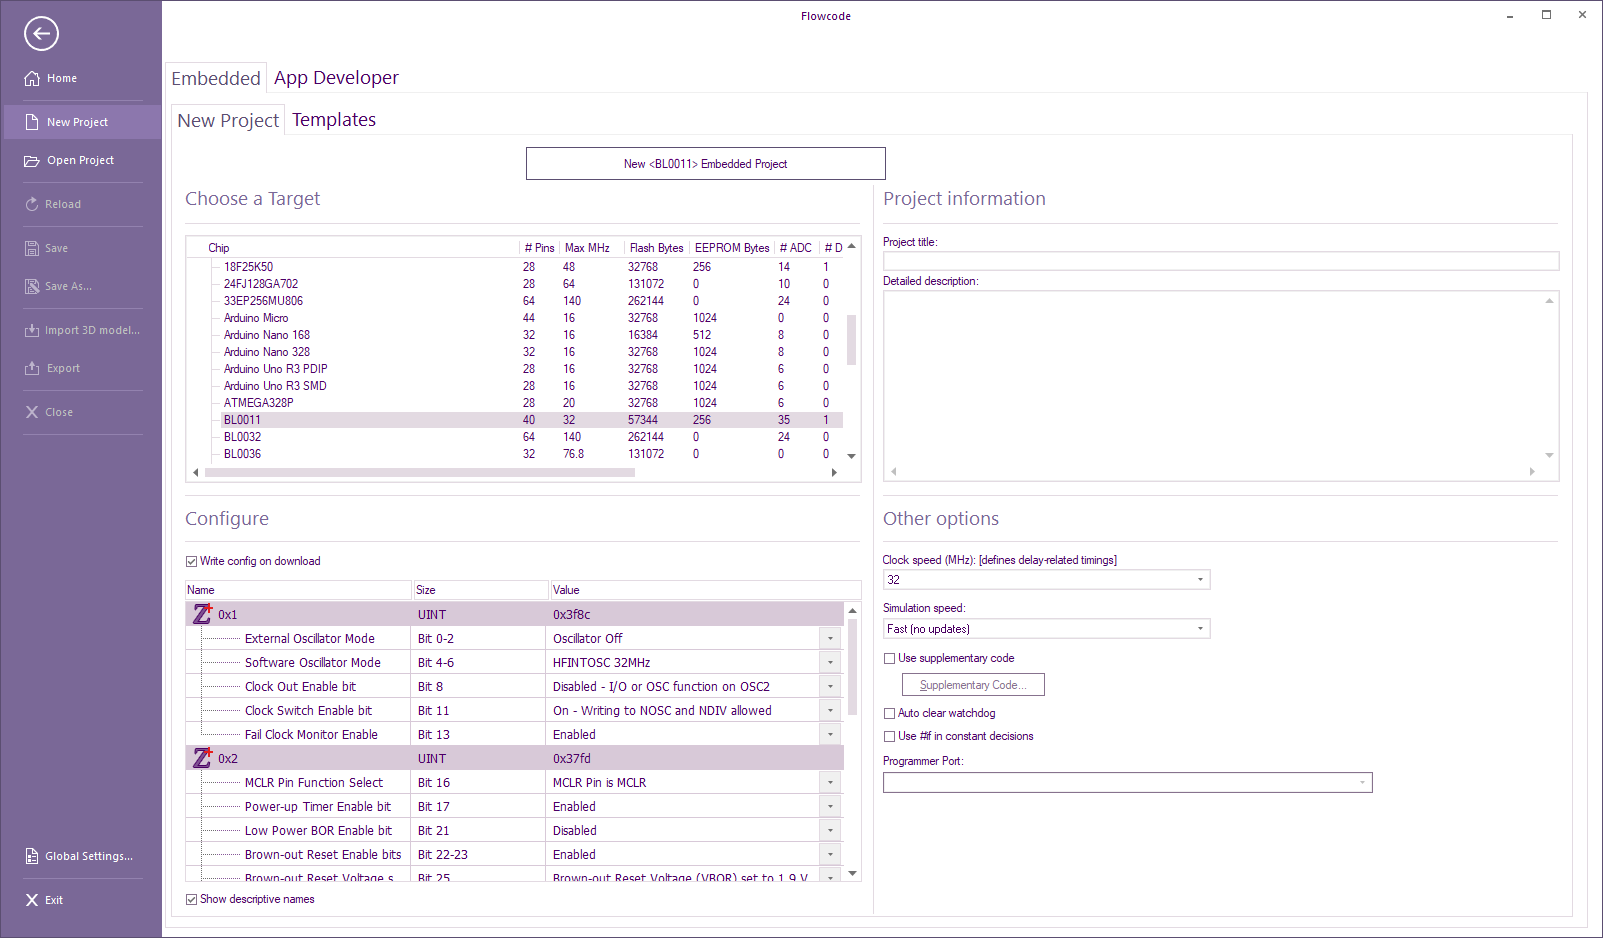
Once a new project is started, you need to select the correct microcontroller. As we are using an BL0011 board, with the default PIC16F18877 attached, we will need to ensure Flowcode has the corresponding chip selected. When using Matrix hardware, this has automatically been configured for the correct config properties and clock speed etc.
Did you know?
Flowcode can program hundreds of different microcontrollers. All are slightly different, and as such, it is essential that you select exactly the right microcontroller you are using.
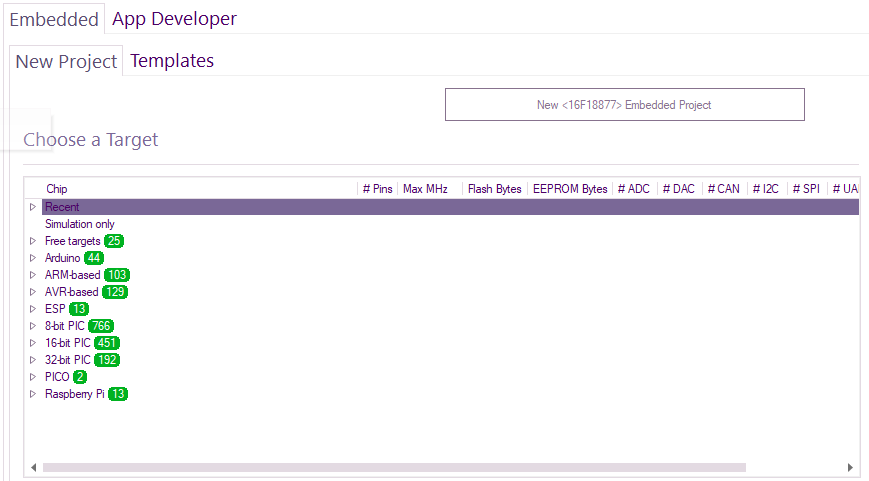
Select the relevant hardware on the following screen depending on what you are working with.
Did you know?
You can change the microcontroller at any point during your development. Select the ‘Project Options’ window by clicking Build->Project Options- >Choose a Target from the main menu at the top of the screen
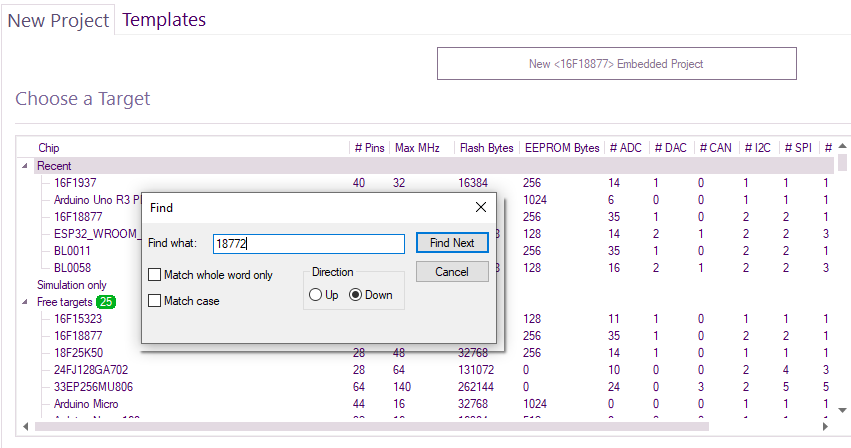
You can also Search for a target. Right-click on any target and select Search. Enter partial or full name:
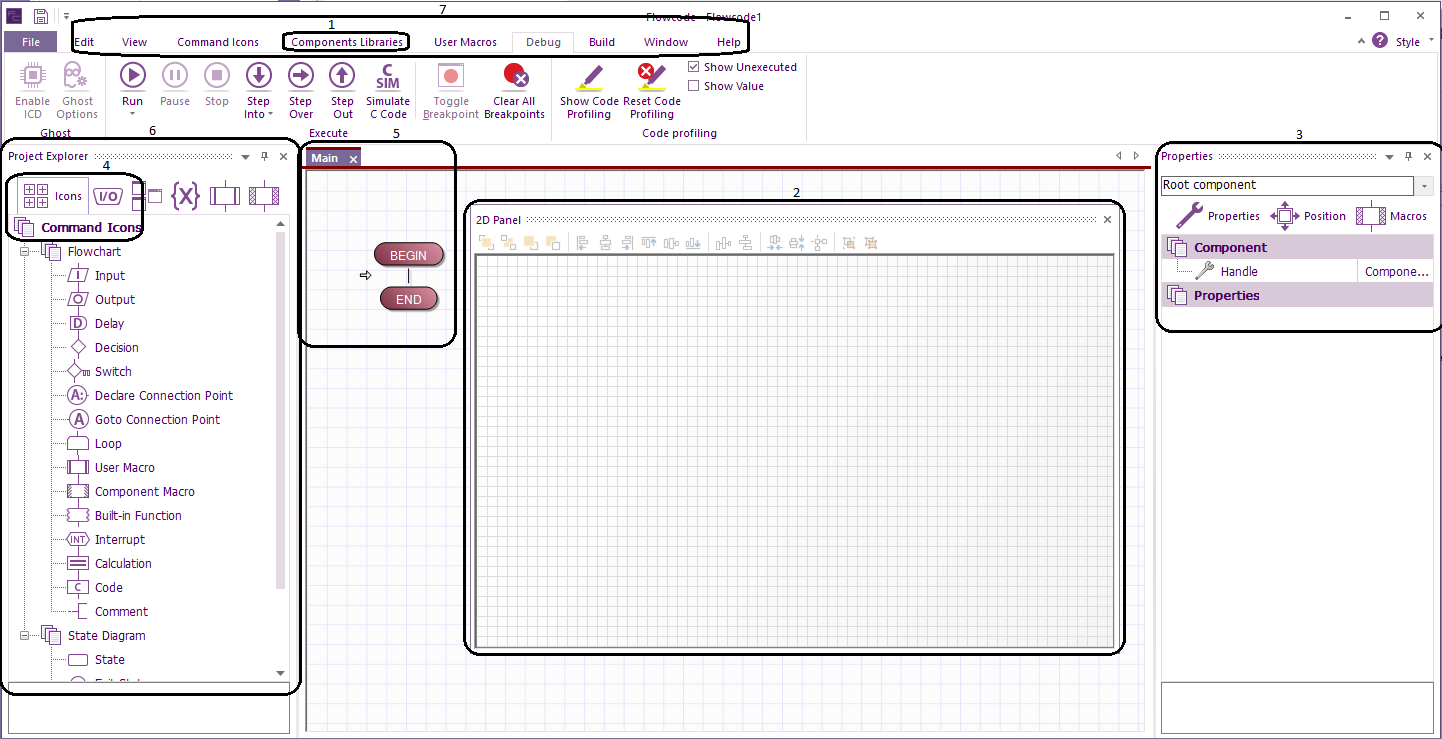
Once Flowcode has opened you will be presented with a blank IDE as seen below;
You can either move the 2D panel out the way or dock it to the right-hand side for example.
1. Components
Provides access to the component library. Double click or drag components onto the simulation panel.
2. Simulation Panel
Where all your components will live. Note; all components you wish to use must be added to the simulation panel.
3. Panel Properties
Here users select which pin/ port of the microcontroller the components are connected to.
4. Command Toolbox
Drag and drop programming icons onto the Flowchart window (5) to construct your program.
5. Main Window
This is where you create flowcharts. All programs will have a ‘BEGIN’ and ‘END’, you must fill in the gaps in between with the programming icons from point (4).
6. Project Explorer
This is where variables and macros (functions) are created, edited and viewed.
7. Ribbon
We use the icons in this ribbon to simulate, program our hardware, add components etc.
The simulation panels
In this next section we will walk you through the 2D and the 3D Panels.
The 2D panels is used are a replacement for the dashboard panel used in previous versions of Flowcode.
You can add as many 2D panels as you like, renaming each to suit your project.
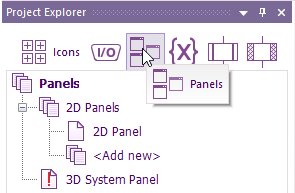
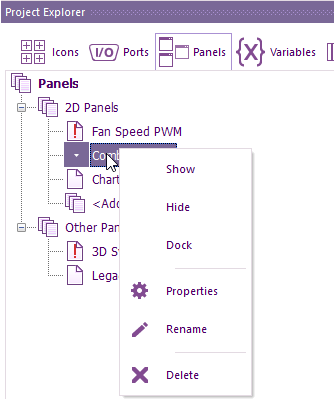
The easiest way to do this is via the Panels tab of project explorer:
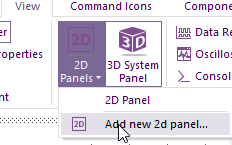
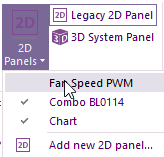
To open a new 2D panel, select the View ribbon>2D Panels>Add new 2d panel
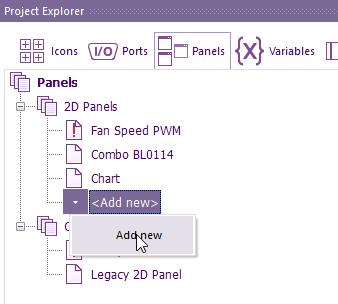
Or within Project Explorer under 2D panels select Add new
If you have multiple panels added then you can select what 2D panels are open by left-clicking on the panel name.
Or you can select the Panels icon within project explorer.
If there is no tick within View Panels or there is a red exclamation mark within project explorer Panels then the panel is closed. Either select the tick or select Show respectively
Note: you will only see the Legacy 2D panel option if opening a project that is previous to Flowcode v10 and the 2D dashboard was in use.
To Rename a panel, select the panel within the Panels option of Project Explorer then select Rename.
The look of each 2D panel can be changed, via the 2d panel properties.
To select the properties option, select the panel within the Panels option of Project Explorer then select Properties.
For example, the panel colour, show a grid and the grid colour etc.
If the snap to gird requires changing, then the Show Grid must be enabled first.
