Difference between revisions of "Exercise - Create an LED Component"
From Flowcode Help
Jump to navigationJump to searchJohnVerrill (talk | contribs) |
JohnVerrill (talk | contribs) |
||
| Line 17: | Line 17: | ||
* Change the name of the component to 'LEDcomponent'. | * Change the name of the component to 'LEDcomponent'. | ||
| − | : To do this | + | : To do this: |
| + | ::* Find the 'handle' of the component at the top of the Panel Properties. | ||
| + | ::* Click on the name 'shape' (the default name). | ||
| + | ::* Change it to 'LEDcomponent'. | ||
| + | |||
| + | * Next, add two properties to the component. To do this, de-select the hemisphere by clicking anywhere outside it in the Systems Panel. | ||
Revision as of 16:20, 20 May 2013
- Open a new Flowcode flowchart.
- Make sure that the System Panel and Panel Properties are visible.
- If they are not, then select them in the View menu.
- Click on the hemisphere shape in the Shapes menu and drag one onto the Systems Panel.
- The blue dotted square around it shows that this object is currently selected.
- Right-click and select 'Center all objects' from the menu.
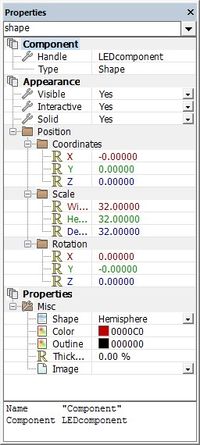
- Change the name of the component to 'LEDcomponent'.
- To do this:
- Find the 'handle' of the component at the top of the Panel Properties.
- Click on the name 'shape' (the default name).
- Change it to 'LEDcomponent'.
- Next, add two properties to the component. To do this, de-select the hemisphere by clicking anywhere outside it in the Systems Panel.
