Exercise - Exporting the Traffic Cone Component
From Flowcode Help
<sidebar>Sidebar: Component Exercises</sidebar> Now that we have created the traffic cone component in the previous Exercise - Building a Complex Component article we can now export the component (which also contains the 'newLED' component we created earlier) for use elsewhere.
Preliminaries
- Create a traffic cone component as shown in the Exercise - Building a Complex Component - the Traffic Cone article.
Declaring the interface
Before you export a component, you need to 'declare the interface'.
- Move the mouse cursor over the System Panel, and right-click.
- Select the option 'Export component' to open the 'Component Management' window.
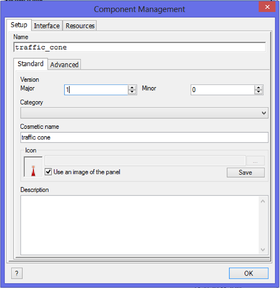
- Configure this for the traffic cone component as follows:
- Click on the 'Setup' tab.
- Don't assign a category. As a result, the traffic cone will appear in the 'Misc' toolbox.
- Give the component a 'Cosmetic name' of "traffic cone", which then becomes the name given to it in the 'Misc' toolbox.
- Click on the check-box next to the 'Use an image of the panel' label.
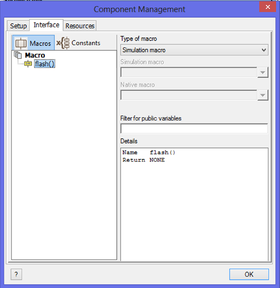
- Click on the 'Interface' tab.
- Set the 'flash' macro as a simulation macro, by clicking on 'Simulation macro' in the 'Type of macro' drop-down menu.
- In this case, there are no additional files to save with the component, and so you don't need to use the 'Resources' tab.
- Click on 'OK'.
Saving the component
- You may be asked to save the current flowchart. There is no need to do so.
- For the component, the 'Save As' dialogue box opens. This will automatically point to a destination used by Flowcode for components. Select a suitable name for the component.
- Click 'Save'. The component file is saved with a '*.fcpx' extension.
What next?
Create a Flowcode flowchart to test the component, such as the one given in the next exercise Importing and Testing the Traffic Cone

