DifferentCodeSimAndDownload
Work in progress
Contents
Introduction
In some cases it is necessary to use different code for simulation and for download.
Simulation icons automatically get ignored for compilation but often to drive the simulation macros you need additional code such as calculations and variables.
It can therefore be useful to separate out the simulation side code so that it does not consume resources for the embedded target.
We will be creating two simulation event macros that will automatically get called when the simulation is started and stopped.
The simulation macros are called:
Ev_Start and Ev_Stop
Setup
Add the LED Array [2D] from Component Libraries > Outputs > LEDs to the 2D panel.
We will be using this component later within the Decisions section.
Creating Sim Property
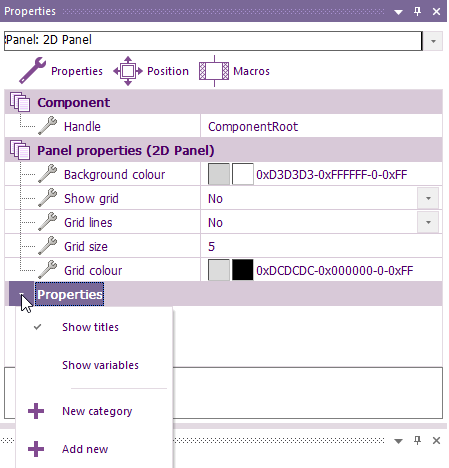
Click on the 2D Panel and right-click Properties
Click the drop-down next to properties and select Add new.
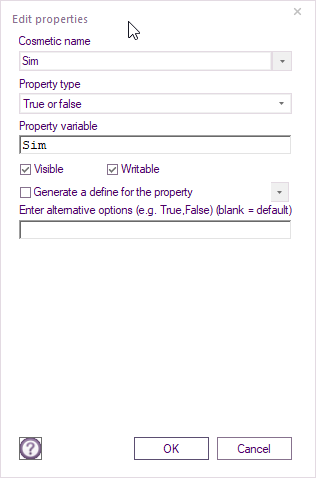
Change cosmetic name to Sim, Property type to True or False, Property Variable to Sim.
Click OK and ensure the property value is set to No.
I also went back into the property edit dialogue after setting the value and unticked Writable to stop the user from manually changing the value but this isn't required. Simply double click the property to open the edit dialogue again.
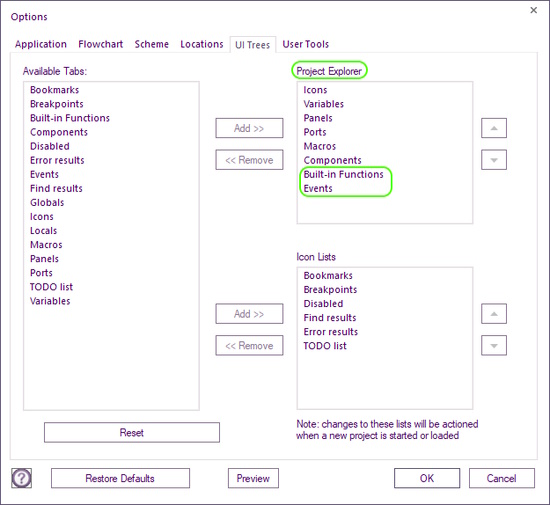
Add Events and Built-in Functions to project explorer, so it will look like this:
You can reduce the width by dragging, but you will lose the titles:
This only requires doing once
The extra UI trees can be added by File > Global Settings > UI Trees tab
Make sure the vents and Built-in Functions are moved to the Project Explorer window:
Creating Event Macros
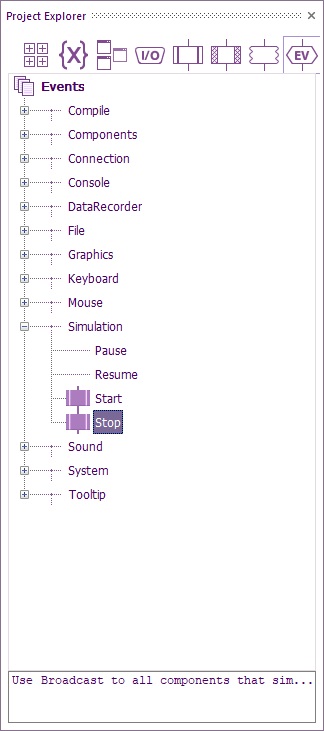
On the project explorer window click on the Events tab.
Click on + of Simulation to expand.
We are intrestesred in Simulation Start and Stop
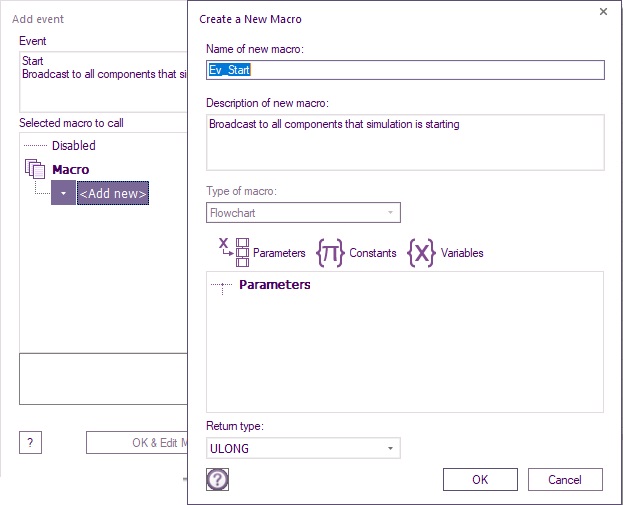
To create the event macro, double click on Start then double click on <Add new>
Click on OK and then OK
Within the Events of the Project Explorer, there should be an Event (Ev) macro icon next to both Simulation Start and Stop
That means that two Event macros have been created.
Ev_Start which is automatically accessed when the simulation has started and Ev_Stop which is automatically accessed when the simulation has stopped.
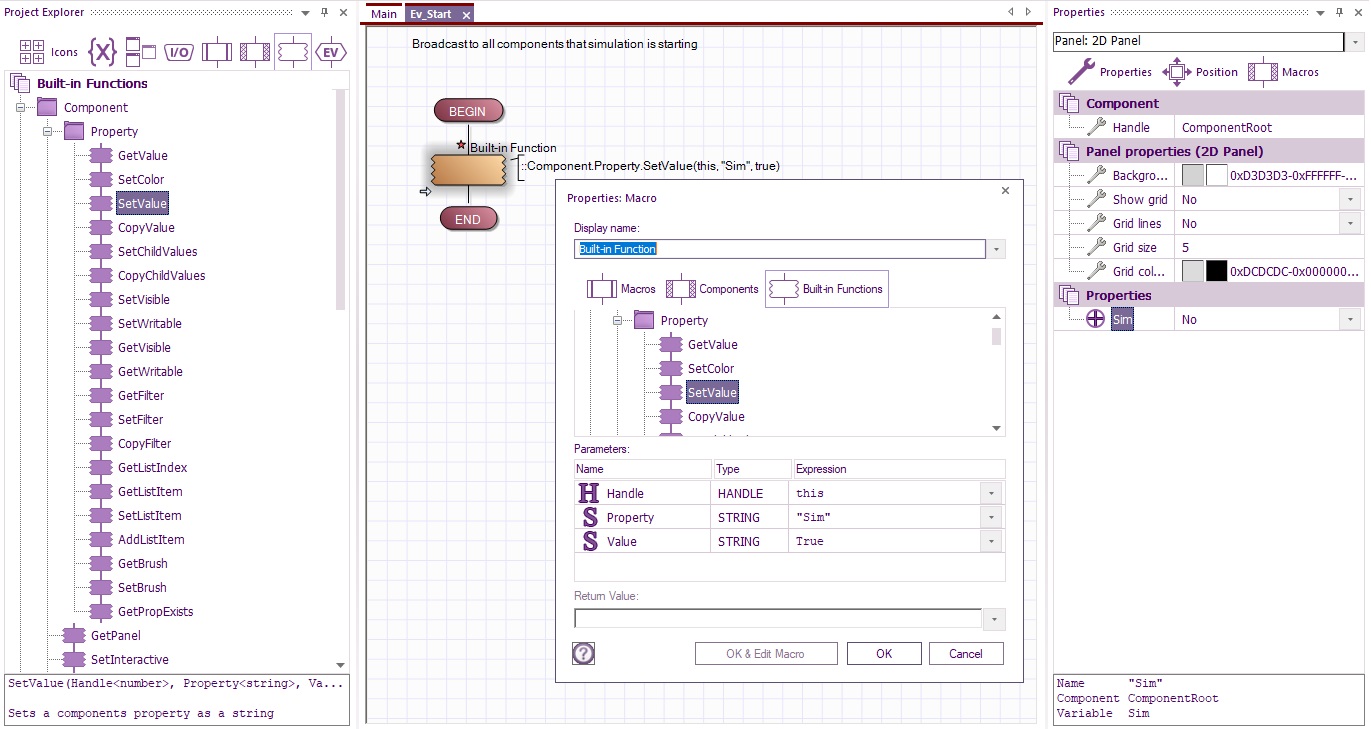
Select Macros within Project Explorer, double click Ev_Start
Select Built-in Functions within Project Explorer', expand Component by clicking on the + and then expand Property.
Drag SetValue to the Ev_Start event macro, the properties window will open.
Within Handle enter this
'this refers to a property in "this project" or "this component" if the project is being exported as a component.
Within Property enter "Sim"
"Sim" is the name of the property in quotes to avoid referring to the property value.
Within Value enter True
True is what the property value will be set to, i.e. in this case Yes instead of No will be showing.
Select OK
Repeat the above steps for Ev_Stop event macro (select from Macros within Project Explorer).
The only difference is Value is False instead of True
Decisions
You can now add the Sim decisions anywhere in your program where Sim and download need to do different things.
As the decision is referring to a property, the generated C code is fixed and so the decision code gets optimised out when downloading to a microcontroller.
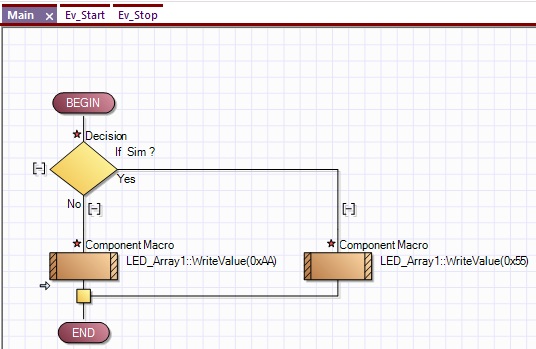
Add a Decision Command Icon to double-click on the decision branch and enter Sim
Sim is the name of the property which is treated the same as a variable would.
Adding a single property or variable without an expression means it's true for any value except 0.
To the Yes branch drag LED_Array1 WriteValue and enter 0x55 (You could use decimal 85 or 0b01010101).
To the No branch drag LED_Array1 WriteValue and enter 0xAA (You could use decimal 170 or 0b10101010)
The red stars mean I have not saved the project after editing.
Now the project is completed.
What will happen is if the simulation is run, the value sent to the LEDs will be 0x55.
When the simulation is stopped, the value sent to the LEDs will be 0xAA.
When the code is sent to a microcontroller as the simulation will not be running then everything in the Yes branch will be ignored, so only no branch will be sent to the microcontroller.
Example File
Here is a Flowcode example file showing the completed functionality.
