Difference between revisions of "Exercise - Exporting the LED Component"
From Flowcode Help
Jump to navigationJump to searchJohnVerrill (talk | contribs) |
|||
| Line 1: | Line 1: | ||
| + | Create a LED component as shown in the [[Exercise - Create a LED component]]. | ||
| + | |||
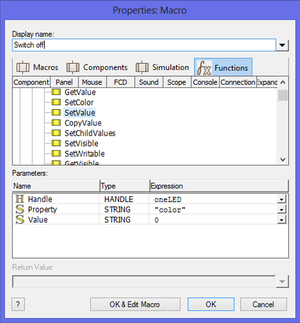
[[File:Gen exerciseLEDcreate macropropsLEDoff 01.png|300px|right]] | [[File:Gen exerciseLEDcreate macropropsLEDoff 01.png|300px|right]] | ||
| + | ==Setting the category== | ||
| + | '''Select category''' | ||
| + | '''Description and other details''' | ||
| − | + | ==Declaring the interface== | |
| − | |||
| − | |||
* Move the mouse cursor over the [[System Panel]], and right-click. | * Move the mouse cursor over the [[System Panel]], and right-click. | ||
* Select the option 'Export component'. The [[Component Management]] dialogue box opens. This replicates the settings, [[Settings Manager]], [[Interface Manager]] and [[Resources Manager]] available on the [[Panel Properties]]. | * Select the option 'Export component'. The [[Component Management]] dialogue box opens. This replicates the settings, [[Settings Manager]], [[Interface Manager]] and [[Resources Manager]] available on the [[Panel Properties]]. | ||
| − | * Configure this for the LED component. In particular, click on the 'Interface' tab, and set the 'LEDoff' and 'LEDon' macros as ' | + | * Configure this for the LED component. In particular, click on the 'Interface' tab, and set the 'LEDoff' and 'LEDon' macros as 'Component' macros. The 'PinChange' macro is a 'Hidden' macro. |
* Click on 'OK'. | * Click on 'OK'. | ||
| + | ==Saving the component== | ||
* You may be asked if you want to save the current flowchart. Do so if you wish. | * You may be asked if you want to save the current flowchart. Do so if you wish. | ||
| − | * The 'Save As' dialogue box opens. | + | * The 'Save As' dialogue box opens. This will automatically point to a destination Flowcode will search for components. Select a suitable name for the component. |
* Click 'Save'. The component file is saved with a '*.fcpx' extension. | * Click 'Save'. The component file is saved with a '*.fcpx' extension. | ||
| + | |||
| + | ==Testing the component== | ||
| + | Select to create a new flowchart from the main menu. | ||
| + | |||
| + | Go to the category your component was assigned to be in. If you did not select a category you will find the component in'''Misc'''. | ||
| + | |||
| + | Drag your component onto a panel, or double click on it. | ||
| + | |||
| + | '''Create a test flowchart''' | ||
Revision as of 10:31, 22 May 2013
Create a LED component as shown in the Exercise - Create a LED component.
Contents
Setting the category
Select category Description and other details
Declaring the interface
- Move the mouse cursor over the System Panel, and right-click.
- Select the option 'Export component'. The Component Management dialogue box opens. This replicates the settings, Settings Manager, Interface Manager and Resources Manager available on the Panel Properties.
- Configure this for the LED component. In particular, click on the 'Interface' tab, and set the 'LEDoff' and 'LEDon' macros as 'Component' macros. The 'PinChange' macro is a 'Hidden' macro.
- Click on 'OK'.
Saving the component
- You may be asked if you want to save the current flowchart. Do so if you wish.
- The 'Save As' dialogue box opens. This will automatically point to a destination Flowcode will search for components. Select a suitable name for the component.
- Click 'Save'. The component file is saved with a '*.fcpx' extension.
Testing the component
Select to create a new flowchart from the main menu.
Go to the category your component was assigned to be in. If you did not select a category you will find the component inMisc.
Drag your component onto a panel, or double click on it.
Create a test flowchart
