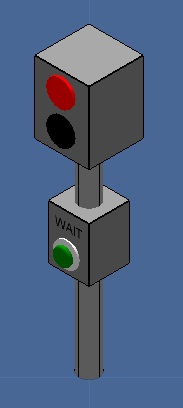
Pedestrian Crossing
Pedestrian crossings are essential in modern road networks to help pedestrians cross the road whilst protecting them from the flow of traffic.
The lights must be clear to read and follow a regular pattern to allow pedestrians, motorists and other road users to know without any chance of confusion what the lights mean and what will come next in the sequence.
Contents
Exercise 1
Setup and analyse the light patterns of a pedestrian crossing.
Tasks
- Create a new flowchart, select ‘No chip’ as the target device and click OK. We choose no chip as this is a simulation only exercise.
- Add the ‘Pedestrian Crossing’ component to the 3D Panel, from the ’Simulation -> Scenarios’ category.
- Adjust the 3D Panel so that you can see the light signal and user panel, The Preset Views button or clicking the arrows at the top left of the 3D Panel window can be very helpful.
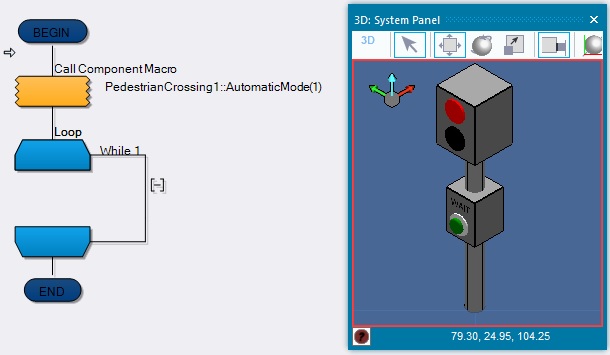
- Add a component macro ‘AutomaticMode’ to start the lights moving through its pre-programmed light patterns.
- Add a loop to your program to loop forever until the simulation stop button is pressed.
- Run the simulation by clicking the Play button on the top toolbar.
- Press the green button on the Pedestrian Crossing user panel and take note of the different states the lights can be in.
Working Example
Below you will see a working example to monitor the light sequence of a pedestrian crossing.
![]() Pedestrian Crossing - Worksheet 1
Pedestrian Crossing - Worksheet 1
Exercise 2
Recreate the automatic light sequence by reading the value of the switch and directly controlling the states of each of the indicators on the pedestrian crossing.
Tasks
- Open the flowchart from Ex1 and continue working from there.
- Remove the component macro call to the AutomaticMode function to disable this from running.
- Add component macro calls in your loop to read the state of the switch and store into a variable
- Add component macro calls in your loop to call the SetLights component macro, add one for each state.
- Add delay icons between the component macros to recreate the automatic mode flow and transition timings.
Exercise 3
Recreate the automatic light sequence using the pre-programmed light states.
Tasks
- Open the flowchart from Ex1 and continue working from there.
- Remove the component macro call to the AutomaticMode function to disable this from running.
- Add component macro calls in your loop to call the SetLightState component macro, add one for each state.
- Add delay icons between the component macros to recreate the automatic mode flow and transition timings.
- Can you think of reasons why this way of coding is better or worse than in Exercise 2?
What to do next
Combine a set of traffic lights with the pedestrian crossing and make a simulation that will allow both light sets to work together.
- The traffic light sequence of lights should run to allow cars to go through.
- When the switch on the pedestrian crossing is pressed transition the traffic lights through into the red light state after a small delay.
- Perform the pedestrian crossing sequence.
- Finally restart the traffic light sequence.
Component Details
A full listing of the macros and properties available in this component are available from the Components Section.

