Assigning Code to an Existing Component
Here is a brief video detailing how to wrap up your custom macros into a component that can be re-used in many projects. This should also prove useful to anyone wanting to understand the basics of creating a component in Flowcode.
The video shows Events within the Project Explorer.
For component creation editing etc., you will need to add the Events and Built-in Functions tabs to the Project Explorer as by default they are not added.
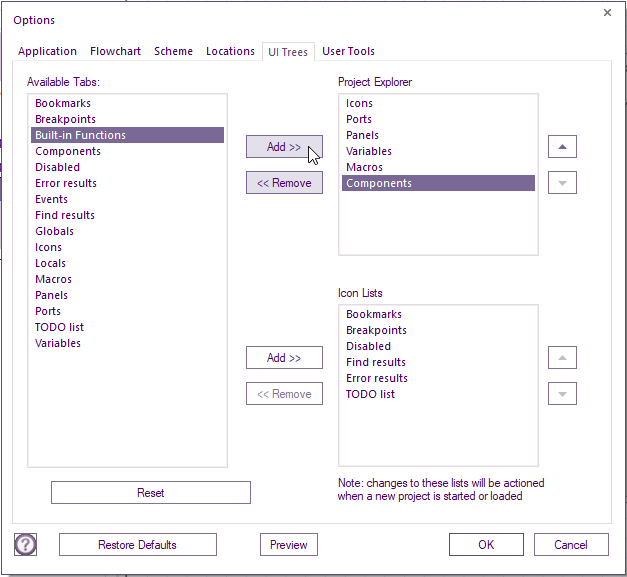
To add tabs, Select File > Global Settings >> UI Trees tab
Select Built-in Functions from within Available Tabs window and click Add >> next to Project Explorer window
Repeat for Events selection.
The order of the tabs van be moved by selecting the function, then clicking the up/down arrows on the right.
Select OK, then reload Flowcode so make sure your project is saved first.
There will be some difference as the video is demonstrating with an older version of Flowcode.
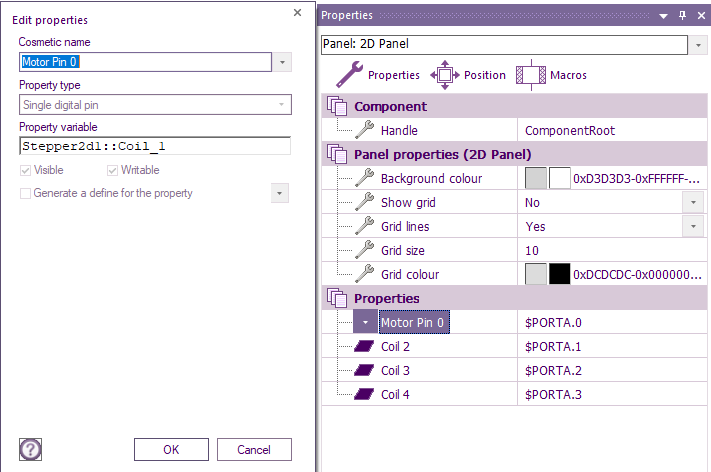
Note: It is now not usually required to add the MotorPin0 property, GetValue and SetValue for built in components.
However, there might be cases where it is required, so its got to lean both methods.
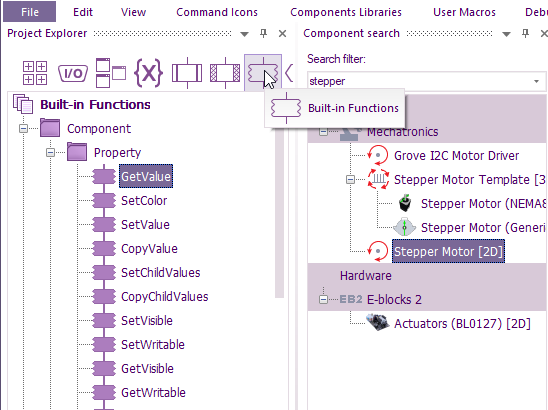
The video shows a simulation icon being dragged to the flowchart working area.
While that is still the case the alternative is to select from the newly added Built-in Functions tab.
The alternative method which is easier and quicker is to select the component, then within the properties, right-click on each connection name (Coil 1 - Coil 4) and choose Expose to top level. Select the panel properties and you can edit each 'Cosmetic name only
I have done that for the first one.


