Flowcode, Arduino and the BL0055 Eblocks 2 board
This FAQ will cover three things:
1. Installing the Arduino and Eblocks 2 drivers
2. Plugging the device into your PC
3. Setting up the board within Flowcode
1. Installing drivers
ARDUINO: Existing Arduino users should already have the relevant Arduino drivers installed. However if you do not have the drivers installed, you can download the
driver folder here:
Arduino Drivers
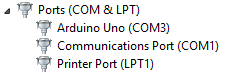
To check whether your Arduino driver is working correctly, plug your Arduino device into your computer and go to your computers Control Panel and then Device Manager and it should show something like this:
EBLOCKS2: You can download the latest E-blocks 2 drivers from the link below, and simply run the relevant executable installer.
Eblocks 2 Drivers
Once again check your Device Manager to see if the Eblocks 2 is working, plug the device in (see step 2. if unsure how) and it should look something like this:

2. Plugging in the device
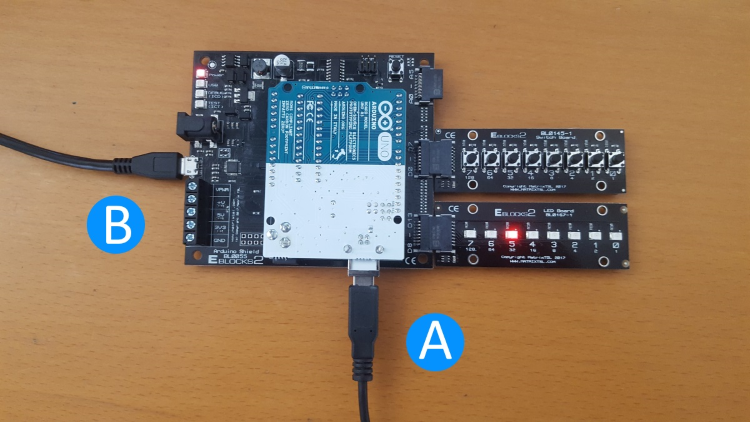
The picture above shows two USB plug in points:
Point A: This plug in point can be used to power the device when programming is not required, however if programming of the Arduino device is required this cable MUST be plugged in to allow programming of the Arduino.
Point B: This plug in point can also be used to power the device when programming is not required, however it CANNOT be used for programming the Arduino. It is however required when using the Eblocks 2 debugging tool 'Ghost'.
So in summary:
A:
- Power
- Programming
B:
- Power
- Debugging
3. Setting up the board within Flowcode
First thing is to select the appropriate Arduino device within Flowcode:
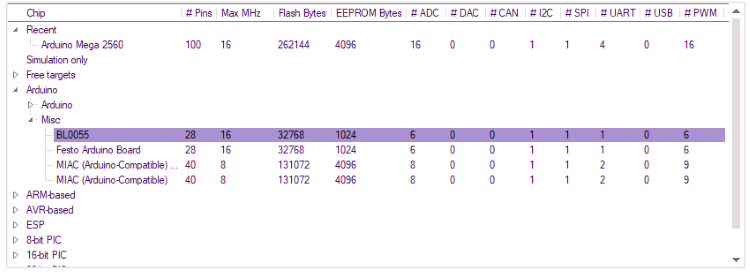
After clicking on "New Project", select "Arduino", then "Misc", then "BLO055".
Next make sure to setup the Arduino device as a target, ensure the device is plugged into USB connection point 'A' in step 2, and then go to Build >> Project Options in Flowcode.
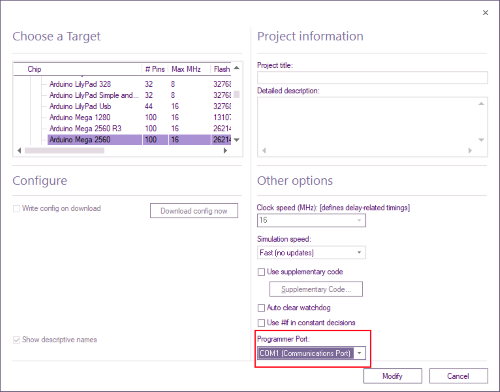
Where it says "Programmer Port", ensure that the Arduino device is selected.
You should now be good to go!